Showing posts with label tutorial. Show all posts

Feb 17, 2012

Painting Watercolour using a Wet-in-Wet Technique

Last summer I made this time lapse video of painting a watercolour using a 'wet-in-wet' approach. That means painting onto wet, cotton paper using wet paint!

Today I added a voice-over to the video. The sound isn't great because I didn't use a microphone - just the built in one in my imac. Still, if you crank up the sound, I think you'll be able to hear it OK.


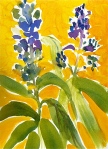
Working "wet-in-wet" is so intriguing because the dampness of the paper, which is made of cotton, creates a softness, a luminosity and an unpredictability as the paint colours mix together and change.

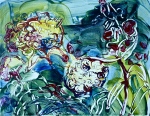
My inspiration came from a small monoprint I made using the watercolour on plexiglass technique that I've recently written about. I projected it onto a full sized watercolour sheet. Then I traced around the colours using a white oil pastel crayon and applying a lot of pressure on the paper. That line of oil or crayon will create a barrier for the watercolour and will work as a resist.
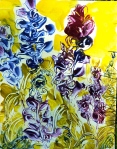
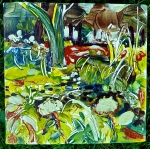
This is the original monoprint that I drew my inspiration from.

Using a mechanical aid and working from an existing piece of art were departures for me - it kind of felt like cheating. What I learned from it is that I could focus on the actual painting because the colours and composition were already worked out.

I'd like to try it again now during winter while I wait for flowers to grow.

Here is another example of enlarging a sketch onto watercolour paper. This is a sketch I made on location at Brier Island a few years ago.

Brier Island's Big Pond.

The resulting enlarged watercolour.
Here is a very short video of the painting process. It works best if you paint watercolours from light to dark.


Why don't you give it a try?  It's interesting to work on a piece that is so much larger than the original. 

Jun 25, 2011

Acrylic Painting - The Red Tulips


In the Sunlight
30" x 36" acrylic on canvas by Flora Doehler SOLD
at the Flight of Fancy, Bear River Nova Scotia


After months of flower deprivation, it was so exciting to find tulips for sale in the grocery store mid winter. One of the disadvantages of living in southwest Nova Scotia is the almost complete absence of flowers in the wintertime - except for expensive roses.
Red tulips against the snow. I would 'fake' a spring backdrop for my painting.

I have a strong need to paint from life so this aspect of life here is a real challenge for me.! It is a great feeling to be present with a living flower and to sense the life force of it. Sometimes I paint from photographs I've taken, but it's not as satisfying an experience for me.

The first marks on the canvas are the hardest.
Although I try to abstract the scene and even change what I am actually looking at,  when a painting is working for me, I  get lost in it and I feel like I am channelling the essence of the object of my gaze.

At this stage, my focus is the colours.
Every painting evolves differently. Some come easily, others are trickier and need more time. The trick is to stay fresh and positive about it. Just like with life's challenges!

This painting went through quite a few stages and changes before I finished it. You can watch this development in the movie I've made for you.


I decided to create large areas of calmness in the painting–a departure from my usual style of creating texture and movement on every square inch of the canvas! The architectural shapes in the work let me experiment with mixing geometrical and organic shapes.

I really liked the dripping paint on the bottom of the canvas, but I finally had to let it go and tone it down so that it wouldn't compete with the drama of the tulips.

I love the way tulips nod their heads. The shapes of their leaves and stems are so beautiful and delicate. I really enjoyed being in the tulip universe while painting this.

You can visit my painting at the Flight of Fancy gallery in Bear River where it is for sale.


Feb 13, 2011

The Round, Brilliant Gemstone Ring

Hello I'm Larry Knox.  I spend part of my time faceting gemstones and then I design and make custom settings for them.  I want to show and tell you about the ring I made with this round brilliant green gemstone that I faceted.

 Diopside  gemstone faceted by Larry Knox.

 I enjoyed the entire process of making a ring but the most exciting part is to cut the gemstone.  The thrill is  cutting the stone in such a way to bring the light in and to make it go back out again so that the stone sparkles. It's like performing magic. 
 Like all round brilliant cuts  this  gemstone has 57 facets. The finished stone is 22 carats which is a weight measurement reserved for gems.


I wanted to design a setting that would look elegant and show us much of the gemstone as possible. I introduced more curves into my initial drawings.    I drew inspiration for my final drawing from the arts and crafts movement and their organic shapes. 

Next,  I made a model of the ring setting which I carved into wax.

 Sizing up the wax ring.

The trick  in making a wax model is to design it  as closely to the finished product  as possible because  the cast silver will include every mark,   and every finishing touch that is on your wax model.

 Carved wax ring setting.

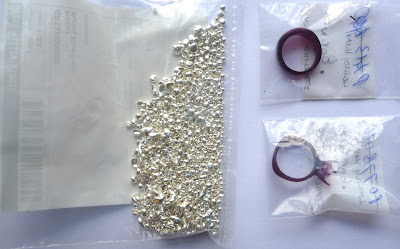
This is silver casting grain that will be used in the lost wax method of casting.  The wax will be destroyed in the process of make in the ring so the setting is truly one-of-a-kind.

 Silver grains will become rings.

After the casting process is complete,  the setting comes out looking dull.

 There is still work to be done!

The next step is to saw off the extra silver called 'the sprue'.


A lot of time is spent cutting, and filing.


The piece must be resized because the casting process reduces the ring size ever so slightly.


 Here is a video with some of the steps taken to make this ring:


 While I finish the details for the ring, Flora paints and we listen to music and podcasts on our iPod.

Green Willow Studio, Bear River, Nova Scotia.

 Measuring the setting for the gemstone.

The next step is to fasten the prongs around the gem stone.

 Setting the stone.

But we're not quite finished yet!  Because of the weight of the gemstone, I soldered a flexible gold band inside the silver band to help prevent the ring from 'flipping'.

 Finally, I polished the ring and off it went to her new owner.

 Round brilliant green diopside gemstone in a silver and gold band by Larry Knox, 2011.


And now it's back to the drawing board for me. Thanks for visiting!

 Pondering the next project.


Aug 25, 2010

Painting the Historic Gardens in Annapolis Royal

In the Begonia Garden by Flora Doehler, 2010. 8" x 8"

This past weekend I joined over 70 artists to 'Paint the Town' in Annapolis Royal. This annual fundraiser for the local Arts Council is a great opportunity for artists to show and sell their work and for collectors to watch artists at work and to buy art at reasonable prices.
The Annapolis Region Community Arts Council (ARCAC) has sponsored the event for years and the weekend runs like a well-oiled machine. Artists arrive from all over Nova Scotia...over 7o painters this year. The artists set up all over town.
Plein Air Painting kit

If you are curious about the contents of my painting kit, click on the photo and read the notes at Flickr.
Volunteer 'runners' circulate and pick up the finished pieces in pizza boxes and take them back to the gallery at the Legion where they hang for sale all day with a 'gallery' price determined by the artist. At 5 o'clock the unsold work is auctioned by silent auction. The Arts Council gets 50% of the amount and thousands of dollars are raised this way every year.

The Artist entry fee is $12.

I was thrilled to be able to set up my paints at the Annapolis Royal Historic Gardens. This park is an oasis of flower garden beds organized around the centuries of the town.
The first morning I scouted around the park with its ancient trees.


I set up in a great spot with dappled light under towering trees. The begonias were a riot of colour and were nicely contrasted by blue salvia flowers. I pulled out all my gear and promptly dropped my piece of German Plum Cake upside-down on the grass. Not to be discouraged, I brushed it off and enjoyed it with my coffee while I studied the flowers and thought about my painterly approach to them. Meanwhile birds hopped around and sang and it was wonderful to be there.

Surrounded by happy flowers.
Wonderful until I realized that I'd forgotten to bring containers for my paint water!! I finished my treat and headed for the recyling bin where I found plastic juice containers! My sharp knife soon transformed them into water jars and it was smooth sailing after that.
Here are the works I painted in the Begonia garden on Saturday. (Click on the images to enlarge them.)


The next day, Sunday,  I spent the early morning in the Victorian Garden while there was still some shade to work in.

The colours were vivid and the zinnias were taller than me. At one point a butterfly was brought out and released to much fanfare.

This was my largest painting. I used up all my matt medium on it.

My Sunday problem was that I ran out of matt medium! It's an essential part of my kit because I use it to get the scratching-in effect in my paintings. I searched out other artists in the park and was given some by artist Shannon Bell and when that ran out, a bottle of the stuff from Louise Baker, an artist with a love of colour who lives in Halifax. Thank you Louise and Shannon!!!

Here are the paintings I did in the Victorian Garden until the sun drove me away. (Click on the images to enlarge them.)
After the heat of the flowers and the sun, I decided to seek out a cool, shady, quiet spot. I found this at the Lily pad pond.


The mosquitos thought it was a pretty nice spot too, in spite of my liberal spraying of citronella. In fact a couple wandered by while I was painting and asked me if I could tell them which flower was giving off that scent. I told them that I was the flower and we had a good laugh over that.

The challenge here was to edit the elements down to make sense of the scene in a painting.
They were visiting from Montreal and I told them about the silent auction. They later lost out on the bids for 2 of my pieces, but found their way to our studio the next day where they bought 2 paintings that I had been working on in my garden. Here is one of them:

Nicotiana
Nicotiana in garden chez moi.

It was truly wonderful to connect with some of the people who bought my works. Over half of the purchasers and bidders had watched me paint in the park. They connected with my interpretation and they also connected with the setting. I think it was nice for them to see the process (well, not the dropped plum cake part). Oh, did I mention that all 12 paintings and sketches that I did over the weekend sold? It's three days later and I'm still flying high about it.
These were my paintings at the lily pond. (Click on the images to enlarge).


At the end of the day I sketched the scene for myself with marker and brush on damp paper. A charming woman from New York walked by to admire it. She thought it would make a gorgeous wallpaper. I told her that it was my souvenir of the weekend and she suggested that I offer it at the silent auction so that she could bid on it.
Well I did and it sold for $50. Here it is for you to see:

The Pond sketch on 9" x 12" watercolour paper. ( The paper is actually white)
Acrylic paint brushed into damp paper.

It was an exciting weekend on many levels - wonderful to meet painters, wonderful to have such a positive response to my work, wonderful to create in such an inspiring setting. And, wonderful to earn some money too which was just as well because our house water situation was failing while I painted.

See you next year at Paint the Town!

photo courtesy of Trish Fry, Annapolis Royal Historic Gardens.

Jun 29, 2010

Acrylic Painting Tutorial

I wanted to “show and tell” you about a recent painting of mine because it expresses the emotional connection I feel for iris.

The Yellow Surprise

There were gorgeous, large bearded irises in my grandmother’s garden over 50 years ago. My mother transplanted some to her garden and eventually I had them in my garden. They moved ½ way across the continent with us when we came to Nova Scotia and are blooming like never before.
Related Posts Plugin for WordPress, Blogger...